Introduction
Video editing has traditionally required expensive software installations, steep learning curves, and compromises between power and accessibility. The emergence of browser-based editing tools powered by WebAssembly technology has fundamentally transformed this landscape, bringing professional-grade capabilities directly to users without downloads, subscriptions, or privacy concerns inherent in cloud-based solutions.
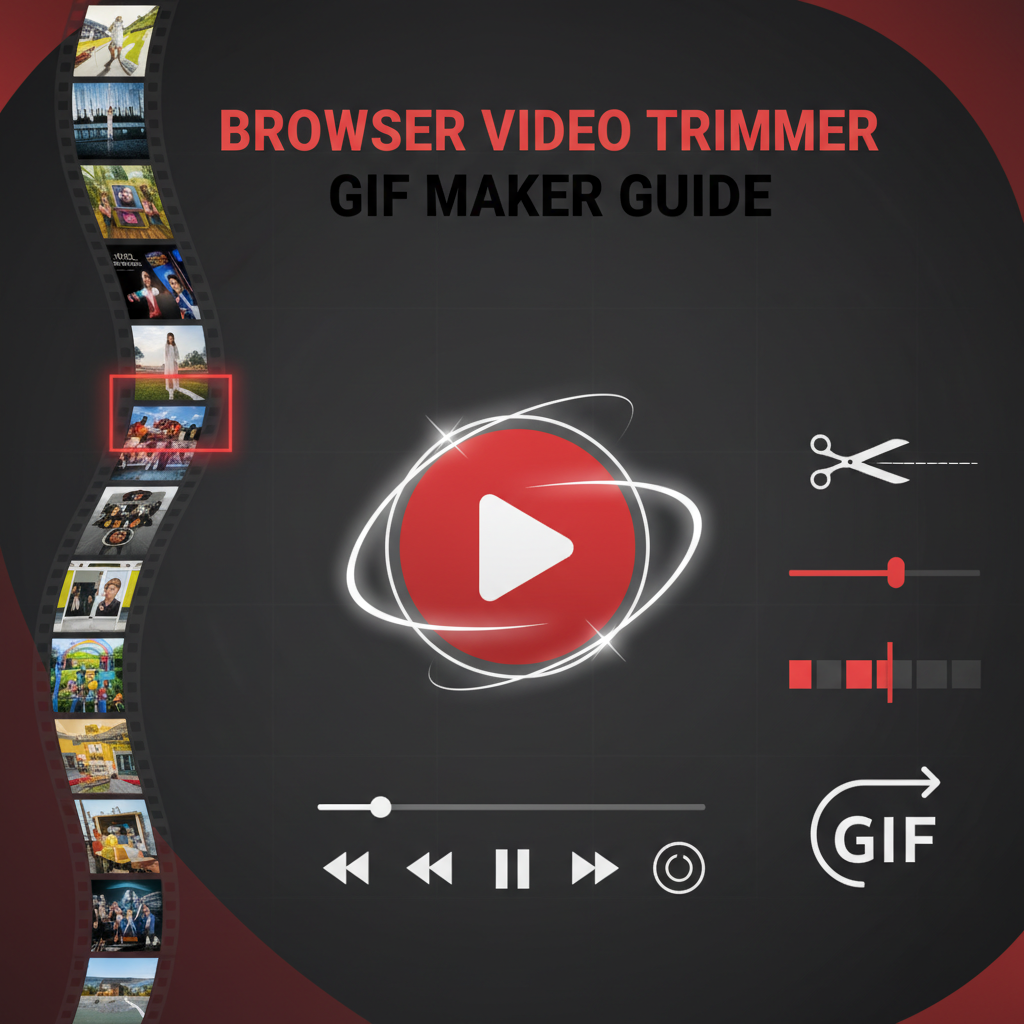
This comprehensive guide explores the art and science of video trimming, animated GIF creation, and audio extraction using modern web-based tools. Whether you’re a social media content creator preparing engaging clips, a marketer crafting viral GIF campaigns, a podcaster extracting audio segments, or an educator developing modular learning materials, mastering these fundamental editing techniques empowers you to create compelling content efficiently.
We’ll dive deep into frame-accurate trimming workflows that ensure precise cuts synchronized with speech and action, explore GIF optimization strategies that balance visual quality against platform size constraints, examine audio extraction use cases from music sampling to podcast production, and discover how privacy-focused browser-based tools eliminate the security concerns that plague cloud editing platforms.
Beyond technical instruction, this guide provides strategic frameworks for deciding when to use trimmed videos versus GIFs, how to optimize content for specific social platforms, and ways to integrate these capabilities into broader multimedia workflows. You’ll learn not just how to trim videos, but why certain techniques produce superior results in specific contexts. By combining technical knowledge with strategic thinking, you’ll elevate your content creation capabilities and streamline production workflows across diverse media projects.
Background: The Evolution of Browser-Based Video Editing
From Desktop Dominance to Web Accessibility
For decades, video editing remained the exclusive domain of desktop applications like Adobe Premiere, Final Cut Pro, and Sony Vegas – powerful but expensive tools requiring significant hardware investments and months of training to master. Casual users wanting to trim a simple video clip faced a paradox: consumer-grade software lacked precision and reliability, while professional tools introduced overwhelming complexity for basic tasks.
Cloud-based editing services emerged as a middle ground, offering simpler interfaces accessible through web browsers. However, these solutions introduced new problems: files required upload and download (time-consuming for large videos), privacy concerns arose as sensitive content passed through third-party servers, and per-project or subscription fees replaced one-time software purchases with ongoing costs.
The WebAssembly Revolution
WebAssembly (Wasm) fundamentally changed what’s possible in web browsers. This compilation target allows code written in languages like C, C++, and Rust to run at near-native speeds in browsers, bringing performance-intensive applications previously restricted to desktop software into the web environment.
FFmpeg.wasm represents perhaps the most significant manifestation of this technology for video creators. FFmpeg, the open-source multimedia framework powering countless professional applications, has been compiled to WebAssembly and runs entirely in your browser. This means professional-grade video processing – the same encoding, trimming, and conversion capabilities used by major studios – now executes locally on your device without uploads, installs, or subscriptions.
The implications extend beyond convenience. Client-side processing eliminates privacy vulnerabilities inherent in cloud services, removes bandwidth bottlenecks that slow cloud-based editors, and democratizes access to professional tools regardless of budget or geographic location. Anyone with a modern browser gains editing capabilities that cost hundreds or thousands of dollars just a few years ago.
GIF: The Format That Refuses to Die
The Graphics Interchange Format (GIF) was introduced in 1987 for simple image sharing. Its support for animation was almost an afterthought, yet decades later, animated GIFs dominate modern internet communication. Despite technical limitations – restricted to 256 colors, inefficient compression compared to modern video codecs, and often larger file sizes than equivalent video – GIFs persist because they solve unique communication challenges.
GIFs auto-play in social feeds without sound, loop continuously to emphasize moments, require no play button interaction, and work universally across messaging platforms. These behavioral characteristics make GIFs ideal for reaction content, memes, product demonstrations, and moments requiring emphasis through repetition. Understanding when GIFs excel versus when video serves better separates effective content creators from those simply following trends.
The Privacy Imperative
Recent years have elevated privacy awareness among users, creators, and businesses. Personal videos, confidential business footage, client content, and sensitive communications require protection that cloud-based editors cannot guarantee. Even services promising encryption face vulnerabilities: server breaches, employee access, legal seizures, and unauthorized data mining.
Browser-based tools processing entirely client-side eliminate these vectors. Files never leave your device, making unauthorized access literally impossible. For journalists protecting source footage, businesses handling confidential material, individuals editing personal content, and any creator valuing privacy, this architectural difference represents not just convenience but necessity.
Workflows: Mastering Essential Editing Techniques
Workflow 1: Social Media Clip Creation
Scenario: You’ve recorded 5 minutes of product demonstration footage and need to create multiple engaging clips optimized for different social platforms.
Strategic Approach:
Step 1 - Content Audit: Watch the source footage identifying the most compelling moments. Mark timestamps where key features appear, problems get solved, or visual interest peaks. Social media success depends on capturing attention immediately, so prioritize segments with strong visual or conceptual hooks.
Step 2 - Platform-Specific Trimming:
- Instagram Reels/TikTok: Trim to 15-30 seconds focusing on one key point. These platforms reward concise, immediate value.
- YouTube Shorts: Allow up to 60 seconds, permitting slightly deeper exploration of features.
- Twitter: Keep under 2:20 (the maximum length) but aim for 30-45 seconds for maximum engagement.
Step 3 - Frame-Accurate Trimming: Use our Browser Video Trimmer to precisely cut each segment. Utilize frame-stepping controls to ensure cuts happen mid-motion during dynamic moments rather than on static frames – this creates visual momentum that holds attention.
Step 4 - Format Optimization: After trimming, use the Video Format Converter to ensure each clip meets platform specifications. Most social platforms prefer MP4 with H.264 codec, but WebM offers superior compression for self-hosted content.
Step 5 - GIF Alternatives: For clips showing quick tips or humorous moments, create GIF versions in addition to video. GIFs auto-play in feeds where videos might not, capturing attention that scrolling users would otherwise miss.
Result: Instead of uploading one lengthy video receiving limited engagement, you create 5-7 platform-optimized clips, each maximizing attention capture for its specific context. This multiplies content value from single recording sessions.
Workflow 2: Podcast Audio Extraction and Editing
Scenario: You recorded a 90-minute video podcast interview and need to prepare audio-only distribution while creating promotional clips.
Strategic Approach:
Step 1 - Full Audio Extraction: Use the audio extraction feature to convert the entire video to MP3 format. This creates your primary distribution file for podcast platforms.
Step 2 - Content Segmentation: Re-watch the interview noting timestamp ranges for particularly compelling stories, insights, or exchanges. These become promotional clip candidates.
Step 3 - Clip Creation: Trim each identified segment from the source video, creating 30-90 second video clips. These clips serve double duty: extract audio for audio-only teasers, and retain video versions for YouTube/social promotion.
Step 4 - Episode Chapters: For longer podcasts, trim and extract separate audio files for each major topic discussed. Listeners increasingly appreciate chaptered content allowing them to skip to sections most relevant to their interests.
Step 5 - Visual Promotion: Create short GIFs from particularly expressive or engaging moments. Text overlays can add context, transforming these clips into standalone promotional content for social feeds.
Technical Consideration: When extracting audio from video podcast recordings, maintain bitrate at 192kbps or higher for professional quality. Lower bitrates (128kbps) work for speech-focused content, but interviews with music or audio examples benefit from higher fidelity.
Result: One video recording becomes a complete podcast episode, 5-8 promotional clips in both video and audio-only formats, and several GIF teasers – maximizing content ROI from single recording sessions.
Workflow 3: Educational Video Module Creation
Scenario: You’ve recorded a 45-minute lecture covering three distinct topics and need to create focused, modular learning content.
Strategic Approach:
Step 1 - Content Mapping: Document the precise timestamp ranges where each topic begins and ends. Educational content benefits from clear segmentation that respects cognitive load limitations.
Step 2 - Module Extraction: Trim each topic into separate video files. Research consistently shows students prefer 5-15 minute focused videos over lengthy lectures. Modular content also facilitates review – students rewatching specific concepts don’t scroll through irrelevant material.
Step 3 - Introduction Standardization: Create a 15-20 second introduction clip that can be prepended to any module, establishing consistent branding and context. Trim this once, then combine programmatically with modules or instruct students to ignore the first 15 seconds of the complete recording.
Step 4 - Demonstration Loops: For procedural content (software demonstrations, science experiments, mathematical derivations), create GIF loops of key steps. These embedded loops in course materials allow students to watch processes repeatedly without video player controls.
Step 5 - Audio Alternatives: Extract audio from lecture modules providing audio-only versions. Accessibility best practices include diverse format options, and some students prefer listening during commutes or while multitasking.
Step 6 - Micro-Content Highlights: Create 30-second “concept summary” clips covering one key idea each. These serve as review tools before assessments or refreshers for students returning to topics after breaks.
Result: One lecture recording transforms into 3 focused modules, concept summary micro-content, demonstration GIFs, and audio alternatives – creating a comprehensive learning system from single recording sessions while respecting diverse learning preferences.
Workflow 4: Marketing GIF Campaign Development
Scenario: Your company has product demonstration videos and needs engaging GIF content for email campaigns, social ads, and website features.
Strategic Approach:
Step 1 - Moment Identification: Review product videos identifying 3-5 second moments that showcase key features or evoke emotional responses. The best GIF moments communicate value instantly without requiring context.
Step 2 - Trimming for Loop Perfection: Trim each moment focusing on creating seamless loops. The best GIFs loop naturally – the end state visually connects to the beginning state, creating infinite repetition without jarring transitions.
Step 3 - Dimension Optimization: Create GIFs at multiple dimensions:
- Email: 480px width maximum (balances quality with email client compatibility)
- Social Ads: 720px width (higher quality justified by advertising spend)
- Website Features: 1080px width (modern displays benefit from higher resolution)
Step 4 - File Size Constraints: Social platforms typically limit GIFs to 5-15MB. Optimize through dimension reduction first, frame rate second (8-10 fps often sufficient), and quality third. Test across target platforms before campaign deployment.
Step 5 - A/B Testing Preparation: Create variations of each GIF with different trim points, speeds, and qualities. Deploy across campaigns with tracking to determine which variations drive superior engagement.
Technical Insight: GIFs for product features benefit from slightly slowed playback (0.75x - 0.85x speed) compared to source video. Slower motion allows viewers to process visual information while maintaining dynamic feeling that static images lack.
Result: Product demonstration footage yields dozens of optimized GIF variations deployable across email, social, and web channels, each tailored to specific platform constraints and use case requirements.
Comparisons: Format and Tool Selection Strategies
Video vs. GIF: The Strategic Decision Matrix
Choose Video When:
- Duration exceeds 10 seconds: GIFs become prohibitively large, and looping that long loses impact
- Audio matters: Narration, music, or sound effects contribute significantly to content value
- Quality is critical: Detailed visuals, text legibility, or color accuracy cannot tolerate GIF’s 256-color limitation
- File size matters: Paradoxically, video often produces smaller files than GIF for equivalent duration and quality
- You need user control: Play/pause, timeline scrubbing, and fullscreen options enhance user experience
Choose GIF When:
- Auto-play is essential: Capturing attention in social feeds where users won’t click play buttons
- Looping emphasizes the point: Repetition creates emphasis and memorability
- Duration under 5 seconds: Short moments suffer less from GIF limitations
- Context is simple: Reactions, demonstrations, or moments that communicate without audio
- Maximum compatibility needed: GIFs work everywhere, including platforms with limited video support
Hybrid Approach: Create both. Post video as primary content with GIF version as preview or promotional content. This maximizes reach while serving each format’s strengths.
Browser-Based vs. Desktop Editing: Capability Comparison
Browser-Based Tools Excel At:
- Quick edits: Trimming, format conversion, basic GIF creation without installation friction
- Privacy-sensitive content: Client-side processing eliminates cloud vulnerabilities
- Cross-platform workflows: Edit on any device without software compatibility concerns
- Casual use: No learning curve or subscription costs for occasional editing needs
- Small file processing: Videos under 2GB process efficiently in modern browsers
Desktop Software Excels At:
- Complex projects: Multi-track editing, sophisticated effects, color grading
- Large files: Professional 4K/8K footage requiring significant processing power and RAM
- Advanced workflows: Proxy editing, extensive plugin ecosystems, project management
- Export control: Granular control over every encoding parameter
- Batch automation: Processing hundreds of files with consistent settings
Strategic Recommendation: Use browser-based tools for 80% of editing needs (trimming, format conversion, simple GIF creation), reserving desktop software for the 20% requiring advanced capabilities. This approach minimizes software costs and complexity while maintaining access to professional tools when needed.
Frame Rate Considerations for GIFs
GIF frame rate significantly impacts both file size and perceived quality:
24-30 fps:
- Matches source video frame rate
- Smooth motion but largest file sizes (often prohibitive)
- Rarely necessary – human perception doesn’t require this fidelity at GIF dimensions
12-15 fps:
- Balances smoothness with file size
- Suitable for fast-motion content (sports, action, gaming)
- Still produces large files for longer durations
8-10 fps:
- Sweet spot for most GIFs
- Noticeably choppy for very fast motion but acceptable for most content
- Significantly reduces file size while maintaining watchability
5-6 fps:
- Very choppy, works only for slow-motion content or intentional aesthetic
- Produces smallest files
- Often looks dated or unintentional
Recommendation: Start with 10 fps, reducing to 8 fps if file size exceeds platform limits. Only drop below 8 fps for slow-motion source content where choppiness becomes less noticeable.
Best Practices: Optimizing Quality and Workflow Efficiency
Frame-Accurate Cutting Techniques
Precision separates amateur from professional video editing. Frame-accurate cuts matter especially when:
Synchronizing with speech: Cut mid-word and viewers notice immediately. Use waveform visualization or audio scrubbing to identify natural pauses, then position cuts during silence between words or phrases.
Creating seamless loops: For GIF loops, the final frame must visually connect to the first frame. Use frame-stepping controls to find natural loop points where motion cycles complete (person returns to neutral position, ball completes bounce, etc.).
Maintaining rhythm: Videos with music or rhythmic content feel “right” when cuts align with beats, measures, or musical phrases. Even viewers without musical training subconsciously notice when cuts clash with musical rhythm.
Preserving action: Cutting mid-motion creates dynamic energy; cutting on static frames feels lifeless. For action content, deliberately cut during movement rather than pauses to maintain visual momentum.
Technique: Use frame-by-frame stepping (usually J/K keys or dedicated buttons) to advance one frame at time, identifying precisely where transitions should occur. This micro-level control transforms adequate cuts into professional ones.
GIF Color Palette Optimization
GIFs support maximum 256 colors – a severe constraint compared to video’s millions. Smart palette optimization maximizes quality within this limitation:
Per-GIF Palettes: Generate unique 256-color palettes for each GIF based on its specific content rather than using universal palettes. Videos of blue skies need different palettes than videos of sunset oranges.
Dithering Strategies:
- Bayer dithering: Creates subtle, regular patterns that blend limited colors, good for photographs and realistic content
- Floyd-Steinberg dithering: Produces more natural-looking gradients but can create visible patterns in smooth areas
- No dithering: Produces banding but smallest file sizes, acceptable for graphics and logos
Color Reduction Preprocessing: If source video contains millions of subtle color variations, preprocessing to reduce color count before GIF conversion often produces better results than letting GIF encoding handle reduction.
Practical Application: For photographic content and screen recordings, use Bayer dithering with per-GIF palette generation. For graphic content with solid colors (user interface recordings, simple animations), disable dithering to minimize file size.
Audio Quality Preservation During Extraction
Audio extraction seems straightforward but nuances affect quality:
Bitrate Selection:
- 128 kbps: Minimum for speech-focused content (podcasts, audiobooks, lectures)
- 192 kbps: Recommended for general content including music
- 256-320 kbps: Use for music-focused content or when source quality justifies it
Format Considerations:
- MP3: Universal compatibility, ubiquitous support, reasonable compression efficiency
- AAC: Superior compression (equivalent quality at lower bitrates), modern platform support
- Opus: Best compression efficiency but limited compatibility outside web browsers
Avoid Re-encoding Cascades: If source video already uses MP3 or AAC audio, extract directly without re-encoding when possible. Each encoding cycle introduces artifacts and quality loss.
Sample Rate: Maintain source sample rate (typically 44.1kHz or 48kHz) rather than upsampling or downsampling. There’s no quality benefit to increasing sample rate, and decreasing introduces audible artifacts.
Privacy-Conscious Workflow Design
Browser-based tools offer inherent privacy advantages, but workflow design amplifies benefits:
Local Processing Advantage: Unlike cloud editors requiring file uploads, client-side tools process everything on your device. This architectural difference means:
- Confidential business videos never touch external servers
- Personal footage avoids potential data breaches
- Client content remains under your exclusive control
- Compliance simplified for HIPAA, GDPR, FERPA regulated content
Metadata Management: Video files contain metadata beyond visual content – GPS coordinates, camera details, creation timestamps. Privacy-conscious workflows strip metadata from videos before sharing publicly while preserving it for personal archives.
Comparison Context: When using our Browser Video Trimmer versus cloud alternatives, your files never leave your computer. Cloud services require upload (potentially unencrypted), processing on servers you don’t control, and download. Each step creates data exposure risk that client-side processing eliminates entirely.
Batch Processing Strategies
Efficiency improves when editing multiple similar files:
Consistency First: Determine optimal settings (trim duration, quality, dimensions) by testing on single representative file. Apply these validated settings to batch rather than individually optimizing each file.
Queue Management: While processing occurs sequentially, queue multiple files minimizing interaction time. Start batch processing, step away for coffee, return to completed files.
Naming Conventions: Establish systematic naming (project-variation-timestamp.mp4) that clarifies relationships between source files and processed outputs. Future-you will appreciate this organization when managing hundreds of clips.
Progressive Enhancement: Start with fastest processing (trim with stream copying), verify results, then apply more intensive processing (GIF conversion, format transcoding) only to clips requiring it.
Case Study: Content Creator Efficiency Transformation
The Challenge
Sarah Martinez runs a mid-sized cooking channel on YouTube and Instagram with 250,000 subscribers. Her workflow involved recording 30-60 minute cooking sessions, then spending 4-6 hours editing each video in Adobe Premiere Pro to create:
- One 12-15 minute YouTube video
- 6-8 Instagram Reels (30-60 seconds each)
- 10-12 Instagram Story segments (15 seconds each)
- 3-5 GIFs for Twitter promotion
This editing workload consumed 20-25 hours weekly – more time than actual filming. She struggled to maintain consistent posting schedules, often missing target upload days when editing ran long. Additionally, she paid $54.99/month for Adobe Creative Cloud despite using only basic trimming and export features.
The Solution Implementation
Sarah redesigned her workflow around browser-based editing tools, separating quick trim operations from complex editing:
Recording Process Refinement: She started filming with rough mental timestamps of key moments – when dishes went into ovens, when crucial technique demonstrations occurred, when she delivered recipe tips. This pre-planning reduced editing time by making trim points obvious during review.
Quick Clip Creation: Using our Browser Video Trimmer, she rapidly extracted Instagram Reels and Story segments directly from source footage. The visual timeline made identifying moments fast, and frame-accurate controls ensured clean cuts at speech pauses and action transitions. This process reduced from 8-10 hours to 90 minutes.
GIF Optimization: She created promotional GIFs showing satisfying moments (chocolate drizzles, rising cakes, plating presentations) using the GIF maker. Testing revealed 480px width at 10fps with 5-second duration provided optimal social engagement, so she batch-created GIFs with consistent settings. GIF creation time dropped from 2-3 hours to 30 minutes.
Hybrid Workflow: She reserved Premiere Pro for only the main YouTube videos requiring complex editing, music synchronization, and graphics. This selective use reduced Premiere time from 20+ hours weekly to 6-8 hours, while browser tools handled the repetitive trimming tasks consuming bulk time previously.
Format Optimization: Using the Video Format Converter, she standardized all clips to platform-optimal formats before upload, eliminating platform-side re-encoding that sometimes degraded quality.
The Results
After two months with the new workflow:
Time Savings: Total editing time decreased from 20-25 hours weekly to 10-12 hours (50% reduction). This time efficiency allowed increasing upload frequency from 3 videos to 5 videos weekly without additional work hours.
Cost Reduction: By using browser tools for 75% of editing tasks, Sarah downgraded from Adobe Creative Cloud subscription to occasional DaVinci Resolve use (free), saving $660 annually.
Consistency Improvement: With faster editing, she met 98% of scheduled posting times compared to 70% previously. This consistency improved algorithmic promotion and subscriber satisfaction.
Quality Maintenance: Despite faster workflows, content quality remained high because browser tools provided sufficient precision for clip work while reserving Premiere for complex projects truly requiring advanced features.
Creative Freedom: Recovered time enabled experimentation with new content formats. She launched a weekly “Quick Tips” series possible only because rapid clip creation reduced production friction.
Key Insights
The case study illuminates several principles applicable beyond cooking channels:
Tool Specialization: Not every task requires professional software. Browser tools excel at repetitive, straightforward operations (trimming, format conversion, GIF creation), while complex editors serve projects requiring advanced capabilities. Matching tools to task complexity optimizes efficiency.
Workflow Segmentation: Separating quick operations from complex editing prevents advanced tools from slowing simple tasks. Handle bulk trimming in minutes using browser tools, then invest editing time where it creates maximum value.
Privacy as Enabler: Client-side processing meant Sarah confidently edited brand partnership videos without third-party data exposure concerns that complicated previous cloud tool usage.
Accessibility Benefits: Browser tools require no installation, making editing possible from any device. Sarah could create Instagram content from her phone while traveling without laptop access.
Call to Action: Transform Your Editing Workflow Today
Video editing complexity need not limit your creative output. Browser-based tools bring professional trimming capabilities, GIF creation, and audio extraction directly to your browser without installations, subscriptions, or privacy compromises. Whether you’re a content creator juggling multiple platforms, a marketer crafting campaigns, an educator developing learning materials, or someone needing occasional video edits, these tools eliminate barriers between creative vision and finished content.
Ready to streamline your video workflow? Try our Browser Video Trimmer & GIF Maker – completely free, instantly accessible, and processing everything locally for guaranteed privacy. Trim videos with frame-perfect precision, create engaging GIFs, or extract audio in minutes without uploading files anywhere.
Expand your multimedia capabilities:
- Convert between video formats using our Video Format Converter
- Compress images and optimize thumbnails with our Image Compression Tool
- Create shareable QR codes linking to your content using our QR Code Generator
The techniques covered in this guide – frame-accurate trimming, GIF optimization, audio extraction, and privacy-conscious workflows – empower you to create professional content efficiently. Start with simple projects: trim a social media clip, create one GIF, extract audio from an interview. As comfort grows, integrate these capabilities into comprehensive workflows that multiply creative output without proportional time investment.
Modern content creation demands efficiency. Browser-based editing tools eliminate the friction that turns simple edits into hours-long frustrations, letting you focus energy on creative decisions rather than technical complexity. The capabilities once requiring expensive software and specialized expertise now await in your browser tab, free and instantly accessible.
Start editing smarter today – your creative projects are waiting.
Additional Resources
Technical References
- FFmpeg Documentation - Comprehensive reference for video processing parameters powering browser-based tools
- WebAssembly Specifications - Technical documentation for the technology enabling browser-based video editing
Format Deep Dives
- GIF Format Specification - Official technical specification explaining GIF capabilities and limitations
- MP4 Container Format - Understanding MP4 structure and codec relationships
The Gray-wolf Tools platform provides comprehensive media processing capabilities through privacy-focused browser tools. Every tool processes data locally, ensuring your content remains secure while delivering professional results without software complexity or subscription costs.